
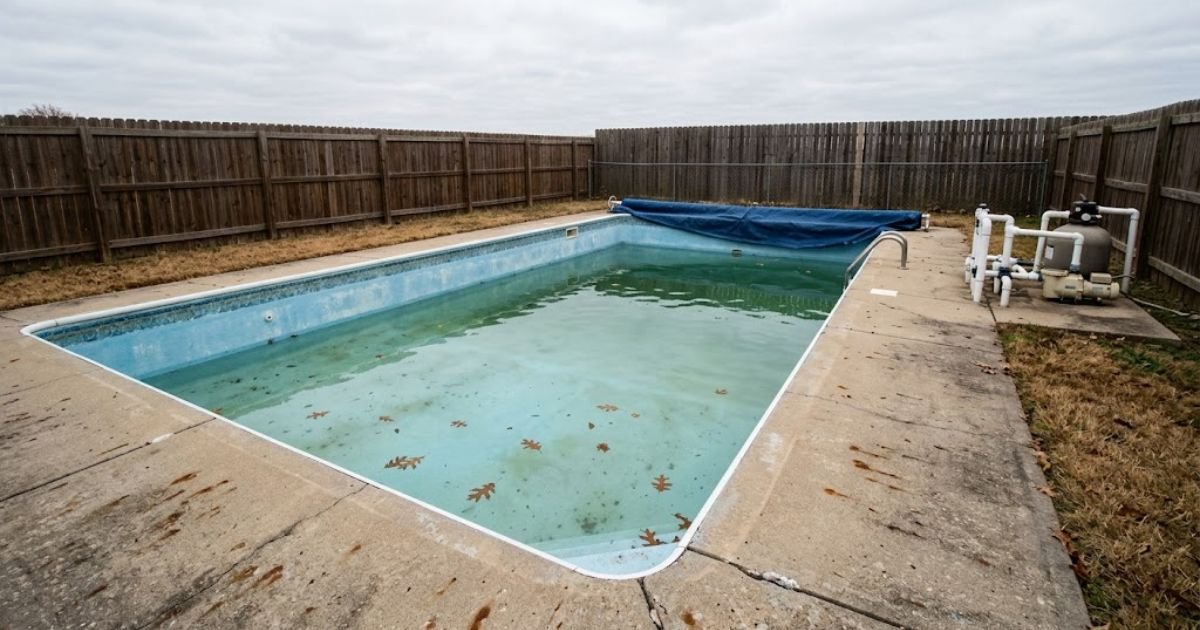
Closing a pool for winter means balancing water chemistry, shocking the pool, blowing out the plumbing lines, lowering the water level, draining and storing equipment, and securing a winter cover before temperatures drop below 32°F. Done correctly, it takes 4 to 6 hours and protects your pool from freeze damage, algae, and mineral buildup until spring.
This guide separates inground and above ground steps, gives you the exact chemical order, and covers line blowout, which most guides skip entirely.
How to Close a Pool for Winter
What Does Closing a Pool for Winter Actually Mean?
Closing a pool for winter, also called pool winterization, is the process of chemically treating pool water, clearing plumbing lines of standing water, removing or storing pool equipment, and installing a winter cover to protect the pool through freezing temperatures. The goal is preventing freeze damage, algae growth, and surface staining during the off-season months.
Many homeowners think closing a pool just means throwing a cover on it. That assumption is what causes the spring surprise: a green, cloudy mess that costs two to three times more to fix than it would have cost to close correctly.
According to the Pool & Hot Tub Alliance (PHTA), closing your pool when nighttime temperatures consistently drop below 65°F is the standard recommendation. Below that threshold, algae growth slows significantly, so your winterizing chemicals can actually do their job without burning through quickly.
When Should You Close Your Pool for Winter?
Close too early and algae blooms under the cover while the water’s still warm. Close too late and a sudden freeze can crack your skimmer, split plumbing lines, or damage your pump housing before you’ve had time to prep anything.
The 65°F rule is the industry standard. But here’s the thing: it’s the water temperature that matters, not the air temperature. Water holds heat longer than air. If you’re in Ohio or Pennsylvania, the air might feel like fall in mid-September, but your pool water could still be sitting at 72°F. Use a pool thermometer, not the weather app.
Or maybe I should say it this way: aim for the water to be consistently below 65°F before you close. If you close when the water is still 70°F, you’re giving algae a head start under a cover it can’t escape from.
| Region | Typical Pool Closing Window |
|---|---|
| Northeast (NY, PA, NJ) | Mid-September to mid-October |
| Midwest (OH, IN, IL) | Late September to mid-October |
| Mid-Atlantic (VA, MD, DC) | October |
| Southeast (mild winters) | November or partial winterization only |
| Southwest and South (TX, FL) | Freeze protection only, rarely a full close |
What You Need Before You Start
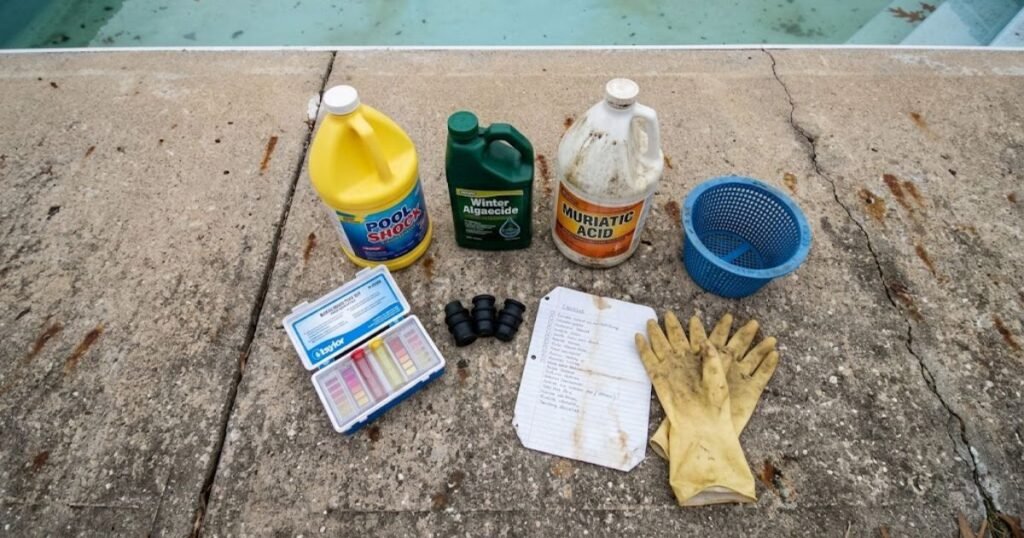
Gather everything first. Starting the process and realizing you’re missing a skimmer plug or a gallon of algaecide means stopping mid-job, which can leave your chemistry off.
Chemical Checklist
- Pool shock (calcium hypochlorite, 1 lb per 10,000 gallons minimum for closing)
- Winterizing algaecide (non-foaming, 60% concentration or higher)
- pH decreaser (muriatic acid or sodium bisulfate)
- pH increaser (sodium carbonate) if your pH is running low
- Alkalinity increaser (sodium bicarbonate) if total alkalinity needs adjusting
- Pool stain and scale preventer (especially important in hard water areas)
- Pool antifreeze, propylene glycol only (for lines that can’t be fully blown out)
- Optional but genuinely useful: Natural Chemistry Pool Magic + PHOSfree, added one week before closing to break down phosphates and organic waste before you seal the pool
A Leslie’s Pool Closing Kit bundles shock, algaecide, stain preventer, and enzyme treatment in a single package. It simplifies the purchasing step and ensures the chemicals are dosed for your pool size. That said, it won’t help if your pH or alkalinity is significantly off, so a water test still comes first.
Equipment Checklist
- Water test kit (liquid reagent kits are more accurate than strips for closing)
- Pool brush, vacuum, and skimmer net
- Air compressor or large wet/dry shop vac (for inground line blowout)
- Expansion plugs for return jets and skimmer lines
- Aquador Skimmer Cover Plate (lets you winterize the skimmer without dropping the water level at all)
- Winter safety cover with water bags or cover clips
- Air pillow (above ground pools only)
- Cover pump for removing standing water from solid covers during winter
Step-by-Step: How to Close a Pool for Winter
To close a pool for winter, follow these steps:
- Deep clean the pool: skim, brush walls and floor, vacuum all debris
- Test and balance water: pH 7.2 to 7.4, alkalinity 80 to 100 ppm, calcium hardness 175 to 225 ppm
- Shock the pool to 10 to 12 ppm free chlorine, run pump overnight
- Wait 24 to 48 hours, then add algaecide, stain preventer, and enzyme treatment in order
- Lower the water level to the correct depth for your pool type
- Blow out and plug all plumbing lines with an air compressor
- Drain and store the pump, filter, heater, and chlorinator
- Install and secure the winter cover
Step 1: Deep Clean the Pool First
Skimming the surface isn’t enough. Brush the walls, steps, and floor. Vacuum everything out, including the corners where debris settles and the areas behind steps where organic matter hides.
Any material left in the pool will consume your sanitizer over the winter and feed algae growth under the cover. Homeowners who skip a thorough vacuum at closing consistently report worse water quality when they open in spring, and a more expensive shock and clarifier treatment to fix it.
Clean pool at closing equals cleaner water at opening. That’s the whole logic.
Step 2: Balance Your Water Chemistry
Run a full water test before you add a single chemical. The chemistry targets for closing are slightly different from your normal summer maintenance ranges.
| Parameter | Target Range at Closing |
|---|---|
| pH | 7.2 to 7.4 |
| Total Alkalinity | 80 to 100 ppm |
| Calcium Hardness | 175 to 225 ppm |
| Free Chlorine | 1 to 3 ppm before shocking |
| Cyanuric Acid (CYA) | 30 to 50 ppm |
Starting pH on the lower end of the range, 7.2 rather than your usual 7.6, helps prevent scale from forming over the winter months. Water chemistry drifts during the off-season, and starting low gives you a buffer against scaling.
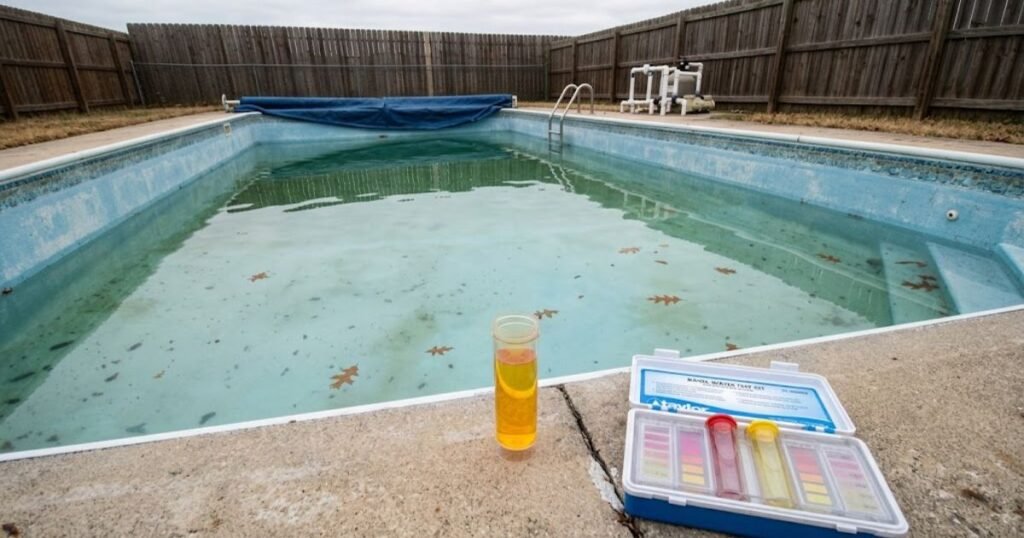
If your alkalinity is below 80 ppm, bring it up first. Alkalinity acts as the buffer that stabilizes pH, so if it’s off, your pH adjustments won’t hold. Adjust alkalinity, then pH, in that order.
Step 3: Add Winterizing Chemicals in the Correct Order
This is the step most guides get wrong, or skip entirely. The order matters because several of these chemicals will react with or destroy each other if added too close together.
The correct sequence:
1. Adjust pH and alkalinity. Wait at least one full pump cycle, 4 to 6 hours, before moving on. The water needs to circulate and stabilize.
2. Shock the pool. Use calcium hypochlorite at a dose that raises free chlorine to 10 to 12 ppm. Broadcast the shock across the water with the pump running. Never pour shock directly through the skimmer. Run the pump overnight to circulate it fully.
3. Wait 24 to 48 hours. Let chlorine drop to below 5 ppm before adding algaecide. High chlorine will destroy algaecide on contact. You’ll be paying for a product that provides no protection.
4. Add the algaecide. Pour it around the perimeter of the pool with the pump running.
5. Add stain and scale preventer. This protects plaster, vinyl, and fiberglass surfaces from mineral deposits that form slowly over the off-season.
6. Add enzyme treatment last. Products like Natural Chemistry Pool Magic + PHOSfree break down non-living organic waste, sunscreen residue, oils, and body organics before they accumulate under the cover.
Quick note: If you have a saltwater chlorinator, turn off the salt cell before shocking. Shock with traditional calcium hypochlorite. Adding a sudden high chlorine load through an active salt cell can damage the cell plates and shorten its lifespan.
Step 4: Lower the Water Level
For inground pools: Lower the water 4 to 6 inches below the skimmer opening. This prevents the skimmer from holding water, freezing, and cracking the housing. If you use an Aquador Skimmer Cover Plate, the plate seals the skimmer from inside and you don’t need to drop the water level at all, which is a meaningful time saver.
For above ground pools: Do not lower the water level. Water in the pool supports the wall structure and provides the base support for your winter cover. Just plug the skimmer and return openings.
Never fully drain an inground pool. This point deserves emphasis. Without water weight, a fiberglass shell can pop out of the ground due to hydrostatic pressure from surrounding groundwater. Vinyl liners will shrink and tear. Even concrete pools can crack or shift. The water is structural.
Step 5: Blow Out and Plug the Pool Lines
This is the most important step for freeze protection. Most basic pool closing articles don’t mention it at all.
Water left inside underground plumbing lines will freeze, expand, and crack the pipes. Underground plumbing freeze damage costs $700 to $2,800 per repair event, according to the DiscoverMyStore Pool Antifreeze Guide (2026). One missed line blowout on a hard freeze night wipes out years of careful maintenance.
How to blow out inground pool lines:
- Attach an air compressor or large wet/dry shop vac to the skimmer suction line.
- Blow air through each line until only air bubbles come out of the corresponding return jets in the pool wall.
- Immediately plug each return jet with an expansion plug while air is still flowing through the line. The air pressure keeps water from rushing back in while you seat the plug.
- Work through each line individually: skimmer line, main drain line (if accessible), all returns.
- For any line you can’t fully blow out, particularly a main drain line that can’t be plugged, pour pool-grade antifreeze (propylene glycol) into the line. Never use automotive antifreeze. It’s toxic and will contaminate your pool water.
Look: if you’ve never done this before and your pool has a complex configuration with a heater, spa, multiple returns, and a booster pump, hire a pool service professional for the first closing. Watch what they do. Then handle it yourself the second year.
Step 6: Winterize the Filter, Pump, and Heater
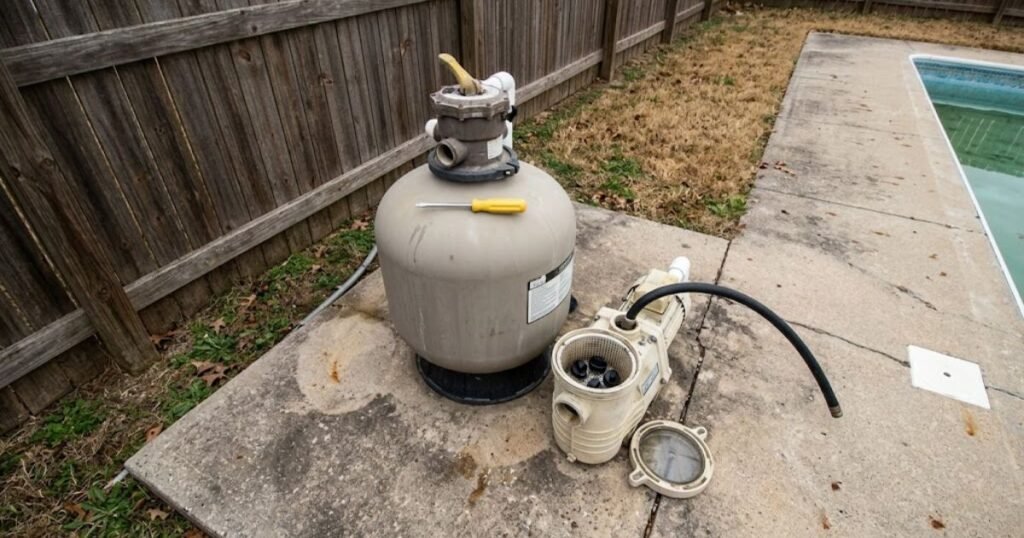
Sand filter: Backwash thoroughly. Set the multiport valve to “winterize” or “closed.” Remove the drain plug from the filter body and the pump housing. Store the drain plugs inside the pump strainer basket so you know exactly where they are when spring comes.
Cartridge filter: Remove the cartridge. Clean it with pool filter cleaner, rinse it completely, and let it air dry before storing it indoors. Do not leave the cartridge sitting in the filter housing through a freezing winter.
DE (diatomaceous earth) filter: Backwash fully, add clean water, backwash again. Remove and clean the grids or fingers with DE filter cleaner. Store them inside for the winter.
Pool pump: Remove all drain plugs from the pump housing and volute. Tilt the pump slightly to drain any water still sitting inside. Store it indoors or in a covered area protected from freezing. The pump volute cracks easily when water inside it freezes and expands.
Gas or electric heater: Drain the heater per the manufacturer’s instructions. Most gas heaters have a drain plug at the base. Remove it, let the unit drain fully, and store the plug inside the heater cabinet. Remove the salt cell if you have one, inspect the electrode plates for calcium scale buildup, and clean with a diluted muriatic acid solution if needed before indoor storage.
Step 7: Install the Winter Cover
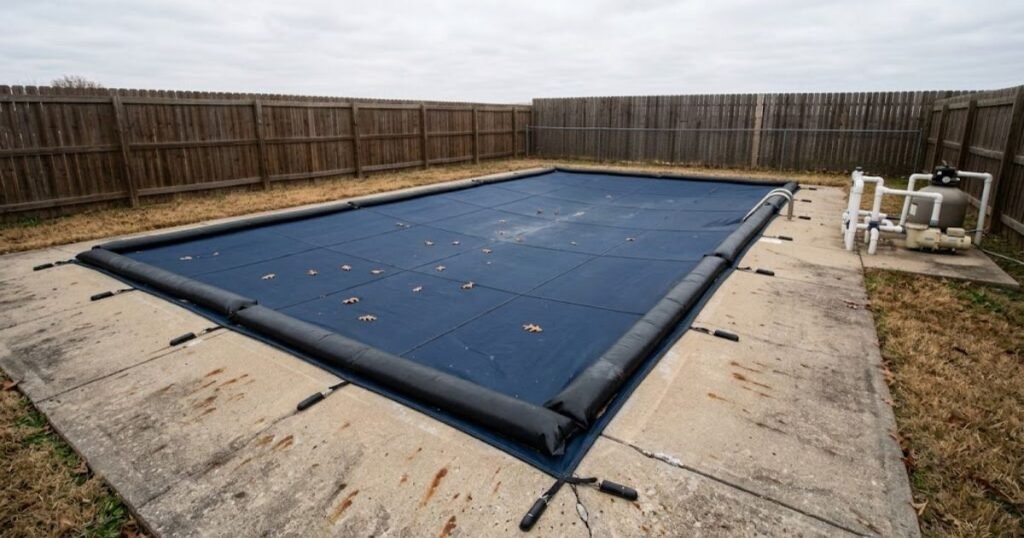
Mesh vs. solid winter cover: A mesh cover allows water to drain through it, so no cover pump is required during winter. But it also lets sunlight filter through, which can encourage algae in warm spells. A solid cover blocks all light and most debris, but requires a cover pump to remove standing water before it gets heavy enough to pull the cover into the pool. Mesh covers work better in heavy snow and ice climates. Solid covers typically produce cleaner water in spring.
For inground pools, use a safety cover secured with water bags or anchor straps. A proper safety cover can support significant weight and prevents children and pets from accessing the water. Do not use a standard tarp. It doesn’t seal at the edges, tears in wind, and allows debris in all winter.
For above ground pools, install an air pillow at the center of the pool before covering. Inflate it to about 60% capacity, not fully inflated. The pillow compensates for ice expansion and transfers ice pressure away from the pool walls toward the center. Secure the winter cover with the cable and winch system or cover clips.
PoolProGuide Tip: Don’t Rush the Chemical Order
After reviewing hundreds of homeowner pool issues, one mistake shows up more than any other: adding algaecide immediately after shocking. High chlorine destroys most algaecides, leaving little winter protection. Wait until free chlorine drops below 5 ppm before adding it.
Above Ground Pool Closing: What’s Different
Above ground pool winterization follows the same general chemical steps but the equipment process is significantly different. The plumbing sits above the frost line, so line blowout isn’t required. Instead, you disconnect and drain everything.
What changes for above ground pools:
- Disconnect the pump hoses and let them drain completely before storage
- Remove and store the pump, filter cartridge, and any hoses indoors
- Remove the return inlet fitting and plug the return opening with a winterizing plug
- Remove the skimmer basket and plug the skimmer port
- Keep the water level at its normal position or just slightly below the return jet
- Install an air pillow centered in the pool before laying the cover
- Secure the winter cover tightly with the cable and winch system that came with the pool
I’ve seen conflicting advice online about whether to use copper-based algaecide in above ground pools with vinyl liners. Some vinyl liner manufacturers note that copper algaecide can cause staining on lighter-colored liners if the pH is off at closing. My read: use a non-foaming, copper-free algaecide labeled as vinyl-safe. You get the protection without the staining risk. Check the product label before purchasing.
Quick Comparison: Inground vs. Above Ground Pool Closing
| Task | Inground Pool | Above Ground Pool |
|---|---|---|
| Lower water level | Yes, 4 to 6 inches below skimmer | No, keep normal level |
| Blow out plumbing lines | Required | Not needed |
| Disconnect and drain hoses | Not applicable | Required |
| Air pillow | Not used | Required before covering |
| Filter storage | Varies by type, cartridge stored inside | Remove cartridge and store inside |
| Winter cover type | Safety cover with anchors or water bags | Above ground winter cover with cable |
| Pool antifreeze | Lines that can’t be fully blown out | Not typically needed |
Common Winterizing Mistakes That Lead to Spring Problems
Some pool professionals argue the biggest spring problem is insufficient chlorine at closing. That’s valid for certain situations, particularly in warmer climates where the pool doesn’t fully drop below 65°F. But the most consistent and expensive mistake, based on what homeowners report year after year, is closing the pool while the water temperature is still above 65°F.
Mistake 1: Closing when water is still warm. Algae growth doesn’t stop because you covered the pool. If the water is above 65°F, algae will grow under the cover all winter. You’ll open to a green pool and spend $100 to $500 on remediation chemicals you didn’t plan for.
Mistake 2: Skipping the line blowout on an inground pool. One hard freeze with water in the lines means cracked underground pipes, broken return fittings, or a split skimmer housing. The repair starts at $700 and climbs fast depending on where the break is and how much excavation is needed.
Mistake 3: Adding algaecide right after shocking. High chlorine oxidizes and destroys algaecide on contact. If you add it too soon after shocking, you’ve paid for a product that provided zero protection. Wait until chlorine drops below 5 ppm.
Mistake 4: Leaving water inside the pump and filter. The pump volute cracks. The filter housing cracks. These aren’t “maybe” outcomes in a hard freeze. They’re consistent results.
Mistake 5: Using a tarp instead of a proper winter cover. A tarp doesn’t seal at the edges, collapses under snow and ice weight, and tears in wind. Fine debris gets in all winter. It’s not a cost-saving measure; it’s a guaranteed worse spring opening.
Mistake 6: Not running a cover pump during winter. Water accumulating on a solid cover gets heavy fast. Left unchecked, it pulls the cover into the pool, tears the anchors, and can cause the cover to fail entirely.
| Mistake | What It Causes | Estimated Cost |
|---|---|---|
| Closing with warm water | Algae bloom by spring | $100 to $500 treatment |
| Skipping line blowout | Cracked underground pipes | $700 to $2,800 repair |
| Algaecide added too early | No algae protection | Loss of product cost |
| Water left in pump | Cracked pump housing | $200 to $600 replacement |
| Tarp instead of cover | Debris-filled pool | Higher opening labor |
| No cover pump | Cover failure from water weight | Cover replacement cost |
Properly Closing Your Pool Saves You Real Money
Homeowners who properly winterize their pools can reduce maintenance and repair costs in the following season by up to 30% (DiscoverMyStore Pool Antifreeze Guide, 2026). Professional pool closing services average $175 to $300 according to HomeAdvisor 2025 data. If an improperly blown out plumbing line cracks during a hard freeze, that single repair starts at $700 and can reach $2,800 for underground pipe damage.
The math is simple. A correct DIY close takes one afternoon and roughly $50 to $150 in chemicals. A missed step can cost ten times that in repairs, plus a delayed pool opening in spring while you wait for a service appointment.
This works best for residential pools in climates with at least one hard freeze per winter. It won’t cover every situation for pools with complex spa plumbing, pools on well water systems with high mineral content, or partially in-ground pools with unique configurations. Those situations benefit from a professional inspection at least for the first closing.
Frequently Asked Questions
What chemicals do I need to close my pool for winter?
You need pool shock, winterizing algaecide, pH adjuster, alkalinity increaser if needed, and a stain and scale preventer. An enzyme treatment like Pool Magic + PHOSfree is optional but helps keep water cleaner through the off-season.
How do I blow out pool lines for winter?
Attach an air compressor to the skimmer suction port. Blow air through each line until only bubbles come out of the return jets. Plug each return immediately with an expansion plug while air is still flowing. Add pool-grade antifreeze to any lines that can’t be fully cleared.
Should I drain my pool for winter?
No. Never fully drain an inground pool. Lower the water 4 to 6 inches below the skimmer, but leave the pool filled. Full draining can cause fiberglass shells to pop out of the ground and vinyl liners to shrink and crack.
When should I close my pool for winter?
Close your pool when the water temperature consistently stays below 65°F. In the Northeast and Midwest, that’s usually mid-September to mid-October. Closing while the water is still warm creates algae growth under the cover.
How long does it take to close a pool for winter?
Plan 4 to 6 hours on closing day for most residential pools. Adding a pre-close enzyme treatment a week early and balancing chemistry the day before makes closing day itself go faster. Pools with spas, heaters, or complex plumbing take longer.